Indian cooking has always been popular both among Indians and non-Indians and is increasing, even more, these days. Many people come across a number of Indian terms from restaurants that can’t help but describe the awesome meal they have recently enjoyed. Two such terms often heard during food conversation is “Roti” and “Naan”. These are the commonly known Indian flatbread that often accompany savory dishes.
Well, traditionally “Naan” is made from plain flour and baked in Tandoor (clay oven). That is the reason we are unable to make this flat Indian bread at home. During eat out’s Butter Naan is in my staple menu. Oohhlalaa that flaky and crispy Naan, dunked into a creamy Malai curry and bliss.. bliss.. bliss.. One bite and it is addictive.
These pandemic times when the restaurants are closed, all I long is for that flaky, smoky, chewy “Butter Naan”. Looking no further, grabbed my apron, tied the knot and I am all set to make the better and healthier version of “Garlic Butter Naan” without a Tandoor.
Before I hop on to the Healthier version of “Garlic Butter Naan” recipe, let us know the basic difference between Tandoori Naan and Tandoori Roti. Naan is primarily used in the context of tandoori Naan, which looks similar to tandoori Roti, yet they are totally different.
|
TANDOORI NAAN |
TANDOORI ROTI |
|
Plain Flour (Maida) |
Wheat flour (Atta) |
|
The dough is proofed with yeast or dough
starter or even soda powder |
The dough is not proofed |
|
Knead the dough with milk or curd |
Knead with water |
|
Usually Triangular shape |
Round shape |
The day I made this, I could barely keep up with my excitement and control my greed until I gulped it down. Somehow I quickly managed to click some pics for my blog and then hogged on as if I am gonna fast for the next couple of days. The “Garlic Butter Naan” turned out so well and this was beyond my expectation. To accompany it I made “Punjabi style Chole” and I will soon share this yummy recipe with you. Have you ever tasted the “Garlic Butter Naan” and “Chole” combination? It is a match made in heaven. Seriously they were Yum!
This recipe is incredibly simple to make at home. Containing basic pantry ingredients, quick and easy to make. Ohh… let me tell you I have tried two alternative methods of cooking “Naan”. 1st I tried cooking in an open pressure cooker; which I was not convinced with the Naan texture and holding the heavy pressure cooker. I am pretty impressed with the 2nd method of cooking; in Tawa / Iron cast pan. Also sharing tips to make the perfect “Garlic Butter Naan: giving the same smoky charred flavor.
Here goes the recipe:
Ingredients:
- 3 cups wheat flour
- 1 teaspoon Salt
- 1 cup Yogurt
- 1/2 cup lukewarm Water
- 1 tbsp. Sugar
- 2 tsp. Active Dry Yeast
- 3 tbsp. Oil
- Water as required
Garlic Butter, to brush on "Naan"
- 4-5 large Garlic cloves, minced
- 2 tablespoons Nigella seeds/Kalonji
- 4 tablespoons Butter
- 3 tablespoons Coriander leaves, minced
Procedure:
Firstly, we need to activate the yeast. For that take ½ cup of lukewarm water add the sugar and yeast. Mix and set it aside.
In 10 – 12 minutes you will notice bubbles on top that means the yeast has bloomed and it is ready to use. If your yeast does not form bubbles that means your yeast is either not fresh or good quality.
In a bowl, sieve the wheat flour, add in the salt, yogurt, oil, yeast water and mix well until combined.
Add water as required, little by little to knead a soft sticky dough. You can knead the dough either by hand or in a stand mixer with the hook attachment.
Once the dough is ready, pat a few drops of oil all over the dough and cover the bowl with a cling wrap or a kitchen towel for 1 hour to 1 hour 30 minutes allowing the dough to proof or rise. During winters you will need more time to proof, so keep it in a warm place preferably in a preheated oven.
The dough is now more than double in size. Punch the dough lightly and knock off the air. Transfer the dough on a flat surface or a large bowl and dust some flour to knead well. Squeeze, stretch and knead well to transform into very soft dough and no more sticky.
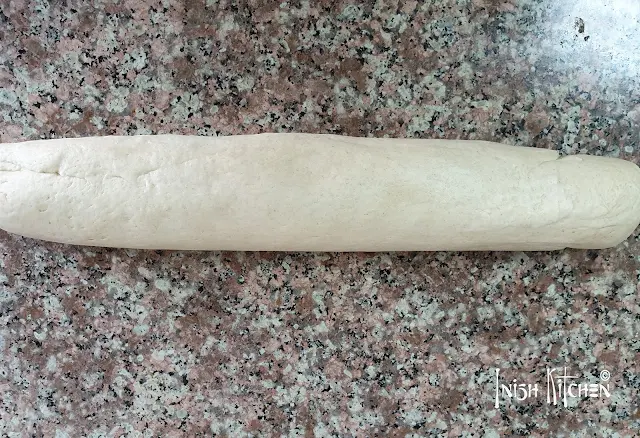
Roll the dough into a log and divide it into equal portions, cover with cling wrap or kitchen towel and allow it to rest for about 15 minutes.
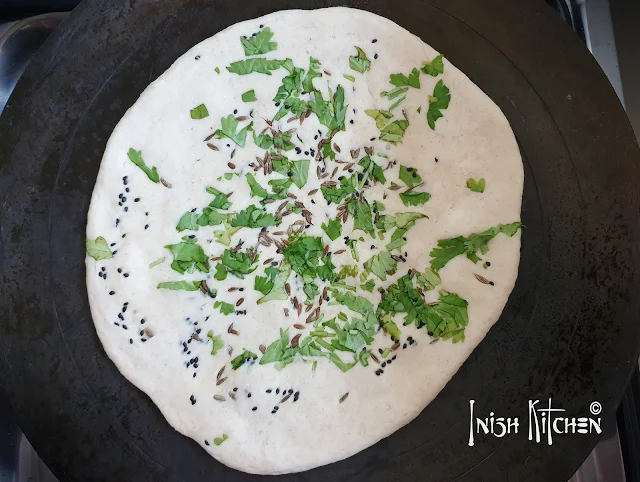
While the dough is resting I am preparing the vegetables mix to be topped on the “Naan”. Mince garlic, coriander leaves and combine it with Nigella seeds.
Keep a bowl of water ready. Shortly, I will tell you why you need it.
Heat up an iron cast pan.
Press the rolled dough over the vegetable mix and pat them well so the veg mince will stick tight.
Usually “Naan” is rolled in a triangle shape but I prefer to have it in round shape. Take a dough ball with the veg mince facing the worksurface, brush some oil over the balls and roll out to your preferred shape with 0.5 cm thickness.
Dip your fingers into the water bowl and spread the water on the flatten dough (the water helps the dough to stick on the Tawa / iron cast pan). Once the pan is hot, carefully lift the “Naan” and place the waterside dough on to the Tawa and cook on medium flame.
Allow it to cook for a couple of minutes until you see bubbles forming.
Lift the Tawa and now tilt it directly onto the flame, you will notice that the “Naan” is stuck on the Tawa.
When you cook directly on the flame, you will notice the bubbles enlarging, getting charred marks and the smoky garlic. Once you feel that the “Naan” is cooked from all sides. Place the Tawa back on the flame and smear some butter over the “Naan”. With the help of a tong or spatula take off the “Naan” and if required apply more butter on the other side of “Naan”.
Repeat the same process for the rest of the dough. It is worth spending the time to bake this “Garlic Butter Naan” at home and serve it immediately accompanied with creamy gravy, pickles, relishes and papads.
Perfect Indian flat bread recipe for a perfect weekend family brunch.
Drop in your feedbacks and I will be pleased to respond them. Be kind to like my page and share the recipes with your friends and family using the buttons on the side, that would really encourage me. God Bless!
Do SUBSCRIBE this Blog and like us on www.facebook.com/inishkitchen if you liked this recipe and wish to receive more updates on the upcoming posts.


Comments
Post a Comment